
nikon d40x owners manual
Welcome to the Nikon D40X Owner’s Manual! This guide is designed to help you master your camera’s features, ensuring you get the most out of your photography journey․ Read carefully to understand settings, modes, and troubleshooting tips for optimal performance․ Happy shooting!

Key Features and Specifications
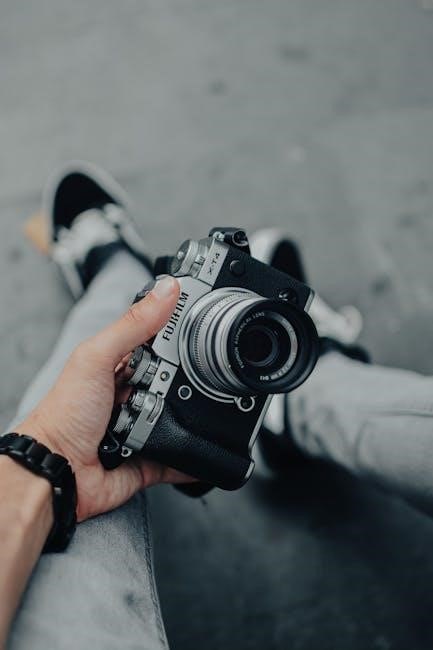
The Nikon D40X is a high-performance DSLR camera featuring a 10․2-megapixel CCD sensor for sharp and detailed images․ It incorporates Nikon’s EXPEED image processing engine, ensuring vibrant colors and reduced noise․ The camera offers a sensitivity range of ISO 100-1600, expandable to ISO 3200 for low-light photography․ It supports continuous shooting at 3 frames per second and features an 11-point autofocus system for precise subject tracking․ The D40X includes a 2․5-inch LCD monitor with 420-pixel resolution for reviewing images․ It also offers 3D Color Matrix Metering II for accurate exposure control and includes a built-in flash with compatibility for external Speedlights․ The camera is powered by a rechargeable lithium-ion battery and supports SD/SDHC memory cards․
Unpacking and Accessories
Upon opening the box, you’ll find the Nikon D40X camera body, a rechargeable lithium-ion battery, a battery charger, a USB cable, an audiovisual cable, and a neck strap․ Additionally, the package includes a body cap to protect the camera when not in use, and a CD-ROM containing software and the user manual․ Ensure all items are included and undamaged․ The camera may also come with a warranty card and quick-start guide․ Handle the accessories with care to avoid damage; Before using the camera, charge the battery fully and familiarize yourself with each component․ If any items are missing, contact Nikon support immediately․ Always use genuine Nikon parts for compatibility and safety․
Getting Started
Start by unpacking and inspecting all accessories․ Charge the battery fully before first use․ Attach the lens, mount the flash if needed, and insert the battery․ Familiarize yourself with basic camera handling to ensure smooth operation․

4․1․ Attaching the Lens
To attach the lens to your Nikon D40X, start by ensuring the camera is turned off for safety․ Locate the white mounting mark on both the lens and the camera body․ Align these marks by holding the lens with one hand and the camera with the other․ Gently slide the lens onto the camera’s lens mount, ensuring it is facing the correct direction․ Once aligned, twist the lens clockwise until it clicks into place․ This click indicates the lens is securely attached․ Avoid forcing the lens to prevent damage․ After attaching, turn the camera on and test the lens to ensure proper function․
4․2․ Mounting the Flash
To mount the flash on your Nikon D40X, start by ensuring the camera is turned off․ Locate the hot shoe mount on the top of the camera․ Align the flash unit with the hot shoe, making sure the metal contacts on the flash align with those on the camera․ Gently slide the flash onto the hot shoe until it clicks into place; Ensure the flash is securely locked to prevent it from coming loose during use․ Once mounted, turn the camera on and test the flash to confirm it is functioning properly․ For optimal performance, use Nikon-compatible flash units to ensure compatibility and avoid potential damage to the camera or flash․ Always handle the flash with care to maintain its functionality․
4․3․ Inserting the Battery
To insert the battery into your Nikon D40X, locate the battery compartment on the bottom of the camera․ Open the compartment by sliding the cover in the direction of the arrow․ Take the EN-EL9 battery and ensure the terminals are facing the correct direction as indicated in the manual․ Gently insert the battery into the compartment, aligning it with the guides․ Close the compartment cover securely to ensure proper power connection․ Once the battery is inserted, turn the camera on to verify that the power is functioning․ Always use Nikon-approved batteries to maintain performance and avoid damage to the camera․ Keep spare batteries charged and readily available for extended shooting sessions․
4․4․ Basic Camera Handling
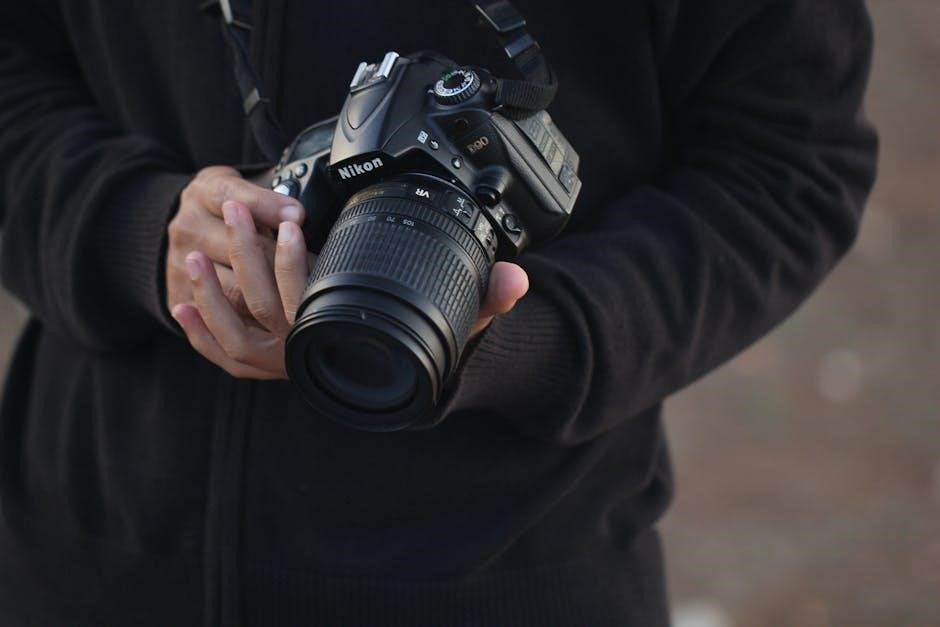
Proper handling of the Nikon D40X ensures optimal performance and longevity․ Hold the camera firmly with your right hand, gripping the contoured handle, and support the lens with your left hand․ Your thumb should rest near the rear control panel for easy access to buttons․ Use the provided neck strap for added security and comfort during extended use․ Familiarize yourself with the mode dial and navigation buttons to quickly adjust settings․ Always use the viewfinder or LCD screen to frame shots accurately․ Adjust the diopter to match your vision for sharp focus․ Avoid touching the lens surface to prevent smudging, and clean it only with a soft, dry cloth․ Store the camera in a protective case when not in use and handle memory cards carefully to avoid damage․
The Control Panel
The control panel provides quick access to camera settings, including ISO, white balance, and shooting modes․ The top panel displays key settings at a glance, while the rear panel offers buttons for menu navigation and image review․
5․1․ Top Control Panel
The top control panel of the Nikon D40X provides essential controls for quick access to camera settings․ The Mode Dial allows you to switch between shooting modes such as Auto, P, S, A, and M․ The ISO Button enables adjustments to sensitivity, while the White Balance Button lets you set the color balance for accurate tones․ The Shutter Release Button is positioned for easy access, and the Metering Mode Button allows you to choose between metering options like Matrix, Center-Weighted, and Spot․ The LCD Display on the top panel shows key settings like shutter speed, aperture, and remaining shots․ This panel is designed for intuitive operation, making it easy to adjust settings without taking your eye off the scene․
5․2․ Rear Control Panel
The rear control panel of the Nikon D40X is designed for easy navigation and access to key functions․ The Playback Button allows you to review captured images, while the Menu Button opens the camera’s menu system for adjusting settings․ The Four-Way Navigation Buttons enable you to scroll through menus, select options, and adjust settings like AF area mode and flash exposure compensation․ The OK Button confirms selections, and the Delete Button deletes unwanted images during playback․ The LCD Monitor displays images, histograms, and shooting information, providing a clear view of your camera’s settings and captured content․ This panel is intuitive, ensuring quick and efficient operation during shooting and playback․
5․3․ Mode Dial
The Mode Dial on the Nikon D40X provides quick access to various shooting modes, allowing you to adapt to different photography situations․ Located on the top of the camera, the dial features preset modes such as Auto, P (Program), S (Shutter Priority), A (Aperture Priority), and M (Manual)․ These modes offer varying levels of control, from fully automatic operation to complete manual adjustment․ Additionally, the dial includes Scene Modes like Portrait, Landscape, Close-up, and Night Portrait, which are optimized for specific shooting scenarios․ Simply rotate the dial to select the desired mode, and the camera will adjust settings accordingly․ The LCD monitor will confirm the selected mode, ensuring seamless transitions between settings․ This feature enhances creativity and efficiency, catering to both beginners and experienced photographers․ Use the Mode Dial to tailor your camera to your artistic vision․
5․4․ Navigation Buttons
The navigation buttons on the Nikon D40X are an essential part of the rear control panel, designed to simplify menu navigation and image review․ These buttons include the four-way controller, which allows you to move up, down, left, and right through menus and images․ The OK button is centrally located and used to confirm selections or settings․ Additionally, the zoom buttons (magnifying glass icons) enable you to preview images at different magnifications, while the trash button lets you delete unwanted photos․ These buttons are intuitive and strategically placed, making it easy to navigate the camera’s functions and review your work efficiently․ They enhance the overall user experience, ensuring quick access to essential operations․ Use them to streamline your workflow and focus on capturing your best shots․

Shooting Modes
The Nikon D40X offers various shooting modes, including Auto, P, S, A, M, and Scene Modes, providing flexibility for photographers of all skill levels to capture stunning images effortlessly․
6․1․ Auto Mode
In Auto Mode, the Nikon D40X simplifies photography by automatically adjusting settings like exposure, ISO, and focus, ensuring great results with minimal effort․ Perfect for beginners, this mode uses Scene Recognition to optimize settings based on the subject․ The camera analyzes lighting and composition to deliver sharp, well-exposed images․ Auto Mode limits manual customization but provides quick, hassle-free shooting․ It’s ideal for casual photography, allowing users to focus on composition and creativity without technical complexities․ The D40X’s advanced image processing engine enhances colors and reduces noise, even in Auto Mode, making it a reliable choice for everyday use․ This mode is a great starting point for new photographers to capture high-quality images effortlessly․
6․2․ P Mode
Programmed Auto Mode (P Mode) offers a balance between convenience and control, letting the camera handle most settings while allowing user adjustments․ The D40X automatically sets aperture and shutter speed for optimal exposure, but users can tweak settings like ISO, white balance, and AF modes for creative input․ This mode is ideal for photographers who want to explore beyond Auto Mode without the complexity of manual controls․ P Mode provides flexibility, enabling adjustments to suit various shooting conditions while maintaining ease of use․ It’s perfect for those transitioning from automatic to manual photography, offering a stepping stone to more advanced modes like S, A, and M․ This mode ensures great results while fostering experimentation and learning․
6․3․ S Mode
Shutter-Priority Auto Mode (S Mode) allows photographers to manually set the shutter speed, while the camera automatically adjusts the aperture for optimal exposure․ This mode is ideal for capturing motion effects, such as freezing fast-moving subjects or creating artistic blur․ Users can select from a range of shutter speeds, making it suitable for sports, wildlife, and creative photography․ The D40X ensures accurate exposures by adjusting the aperture accordingly․ S Mode provides control over timing while simplifying other settings, making it a versatile choice for those who want to experiment with motion and light without manual mode complexity․ It’s a great way to enhance your skills and achieve dynamic results in various shooting scenarios․
6․4․ A Mode
Aperture-Priority Auto Mode (A Mode) offers precise control over the aperture, allowing users to manually set the lens opening while the camera automatically adjusts the shutter speed for proper exposure․ This mode is perfect for controlling depth of field, enabling photographers to isolate subjects or ensure entire scenes are sharp․ A Mode is ideal for portraits, landscapes, and macro photography, where depth of field is critical․ By adjusting the aperture, users can create artistic effects, such as bokeh or sharp backgrounds․ The D40X ensures optimal results by automatically selecting the appropriate shutter speed․ This mode is a powerful tool for photographers seeking creative control over their images without managing all manual settings․
6․5․ M Mode
Manual Mode (M Mode) provides full creative control, allowing users to set both aperture and shutter speed manually․ This mode is ideal for experienced photographers who want precise control over exposure settings․ The D40X’s metering system assists by providing exposure recommendations, but the camera does not automatically adjust settings․ M Mode is perfect for challenging lighting conditions, such as low-light environments or high-contrast scenes, where manual adjustments are necessary․ Photographers can experiment with unique effects, like intentional overexposure or underexposure, to achieve artistic results․ This mode is also a great learning tool for understanding the fundamentals of exposure and how aperture and shutter speed interact․ Use M Mode to unlock your camera’s full potential and capture images exactly as you envision them․
6․6․ Scene Modes
The Nikon D40X offers a variety of Scene Modes to help photographers capture stunning images in specific situations․ These modes automatically adjust camera settings for optimal results․ Popular options include Portrait, Landscape, Close-up, Sports, Night Portrait, and Flash Off modes․ Each mode tailors settings like aperture, shutter speed, and ISO to suit the scene․ For instance, Portrait prioritizes a shallow depth of field to blur backgrounds, while Landscape ensures sharpness across the entire frame․ Sports mode freezes fast-moving subjects, and Night Portrait balances flash with ambient light․ These modes simplify photography, allowing users to focus on composition without manual adjustments․ They are ideal for photographers who want professional-looking results without advanced technical knowledge․ Experiment with Scene Modes to enhance your creativity and capture life’s memorable moments effortlessly․

Menu Functions
The Nikon D40X menu system provides intuitive access to camera settings․ It includes Playback, Shooting, Custom Settings, and Setup menus for easy adjustments and customization of camera functions․
7․1․ Playback Menu
The Playback Menu on the Nikon D40X allows users to manage and enhance their photos post-capture․ Key features include Slide Shows, enabling a sequence of images to be displayed, and Protect, which prevents accidental deletion of important shots․ The D-Lighting option adjusts brightness and contrast to improve image quality․ Users can also Rotate images, ensuring proper orientation․ Additionally, the Print Order feature simplifies selecting images for printing․ These tools offer comprehensive control over image management, making it easier to organize and refine your captured moments effectively․
7․2․ Shooting Menu
The Shooting Menu on the Nikon D40X offers a variety of settings to customize your photography experience․ Image Quality allows you to select from JPEG, RAW, or a combination of both, ensuring flexibility in post-processing․ Image Size lets you choose between different resolutions to suit your needs․ White Balance adjusts color temperature for accurate tones, and ISO Sensitivity provides options from 100 to 1600, with the ability to expand to 3200․ Autofocus Mode offers Single AF and Continuous AF, while AF-S/AF-C Priority Selection lets you prioritize focus or release․ These settings empower you to tailor the camera’s performance to your creative vision, ensuring optimal results in various shooting conditions;
7․3․ Custom Settings Menu
The Custom Settings Menu on the Nikon D40X allows you to tailor the camera to your preferences․ Autofocus settings enable adjustments for focus priority or release priority․ Metering options let you choose between matrix, center-weighted, or spot metering․ Bracketing settings allow you to customize exposure bracketing for HDR or artistic effects․ Additionally, you can modify button assignments to streamline your workflow․ The menu also includes options for noise reduction and image sharpening, letting you fine-tune image quality․ These customizations enhance creativity and ensure the camera adapts to your shooting style․ Use this menu to optimize performance for specific photography needs, making your Nikon D40X a personalized tool for capturing stunning images․
7․4․ Setup Menu
The Setup Menu on the Nikon D40X provides essential tools for camera maintenance and customization․ Format Memory Card erases all data, preparing the card for use․ Language allows you to choose the menu display language․ Video Mode sets the video output format for compatibility with TVs․ Time Zone and Date options let you set the camera’s clock and date․ Monitor Brightness adjusts the LCD screen’s brightness for optimal visibility․ Auto Off timers conserve battery life by turning off unused functions․ Save/Load Settings enables saving custom configurations to a memory card․ These settings ensure the camera is personalized and ready for use, enhancing your photography experience with tailored preferences and optimal performance․
Custom Settings
The Custom Settings menu on the Nikon D40X allows you to tailor the camera to your shooting style․ Autofocus modes can be adjusted for speed or precision․ Metering modes let you choose between matrix, center-weighted, or spot metering․ Bracketing options enable automatic exposure or white balance bracketing for creative control․ ISO sensitivity can be fine-tuned for low-light conditions․ Custom white balance settings ensure accurate color representation․ Noise reduction options help minimize grain in long exposures․ These settings empower photographers to customize their workflow, enhancing image quality and adaptability in various shooting scenarios․ Experimenting with these options can significantly improve your photography results․
Technical Specifications
The Nikon D40X features a 10․2-megapixel APS-C CMOS sensor, delivering high-resolution images with vibrant colors․ It supports an ISO sensitivity range of 100-1600, expandable to ISO 3200․ The camera utilizes Nikon’s EXPEED image processing engine for enhanced performance and noise reduction․ It offers a shutter speed range of 30 seconds to 1/4000th of a second and supports continuous shooting at 3 frames per second․ The D40X includes an 11-point autofocus system for precise subject tracking and a 2․5-inch LCD monitor with 230,000 dots for image review․ It records images on SD and SDHC memory cards up to 4GB․ These specifications make the D40X a versatile and reliable choice for photographers seeking quality and flexibility․